Python for Data Science: Chapter 1: Basics of Python
Installation of Python
python Installation: Features of Anaconda., Installation Procedure. What is Jupyter? Why do we need it? How to create a Notebook in Jupyter ? How to write and execute a python file using Jupyter Notebook?
Installation
•
Anaconda python is a free open source platform that allows us to write and
execute code in the programming language python.
•
Anaconda platform is a popular way to learn and use python for scientific computing, data science and machine learning.
•
You do not need to install python separately when using Anaconda, as Anaconda
comes with its own version of python.
•
Anaconda helps to create an environment for many different versions of python
and package versions.
Features of Anaconda
1.
It is free and open source.
2.
It has more than 1500 python packages.
3.
It simplifies the package management and deployment.
4.
It has tools that can be used to collect data from sources using machine
learning and AI.
5.
It has good community support.
6.
The libraries like Dask, NumPy, Pandas and so on can be used to analyse data
scalably and fast.
7.
The data visualization is possible using Matplotlib.
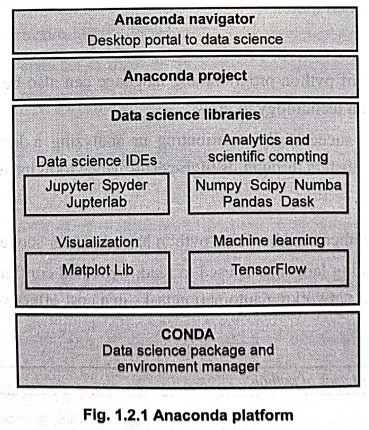
Fig. 1.2.1 Anaconda
platform
Installation Procedure
Step 1:
Open the web site https://www.anaconda.com/download to download the
Anaconda. Click on the download button. The corresponding .exe file gets
downloaded.
Step 2:
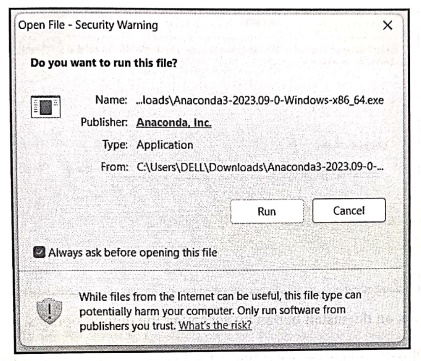
Click on this .exe file and click on Run
button.
Step 3:
The installation process will start. Click on Next button. Click on I
Agree button on
License Agreement
window.
Step 4:
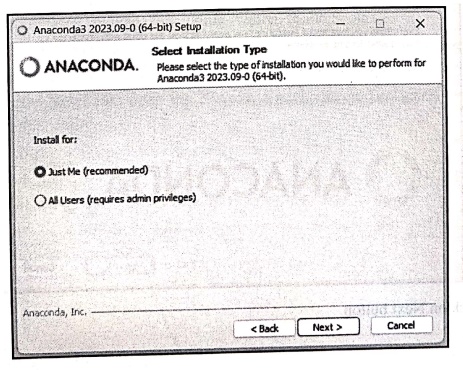
Following kind of pop‒window appears. Select Just me option. And then click the Next button.
Step 5:
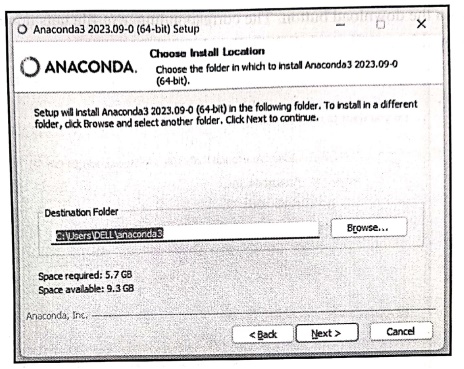
On the next pop‒up window the default
location at which the Anaconda will be installed is represented. Keep the
default location and then click on Next
button.
Then
click on the install button by accepting the default options.
Step 6:
On completing the installation following pop‒up window will appear
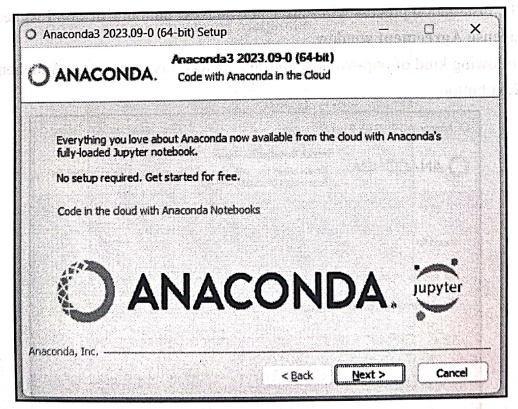
Click
on Next button.
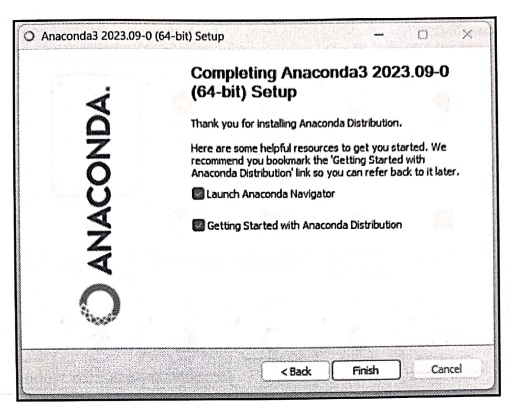
Finally
click on Finish button. The Anaconda navigator will get launched.
What is Jupyter? Why do we need it?
•
A Jupyter Notebook is an open source
web application that allows data scientists to create and share documents that
include live code, equations and other multimedia resources.
•
Jupyter notebooks are used for all
sorts of data science tasks such as Exploratory Data Analysis (EDA), data
cleaning and transformation, data visualization, statistical modeling, machine
learning and deep learning.
•
It supports more than 40 languages including Python, R and Scala.
•
A notebook is a mutable file saved in
ipynb format. Jupyter Notebook has a notebook dashboard to help users
manage different notebooks.
•
To launch Jupyter Notebook, open the Anaconda navigator and select Jupyter
Notebook from the list of applications.
•
Once Jupyter Notebook is open, we can create a new python file.
•
Using Anaconda we can use Jupyter Notebook. This is an interactive computing
environment that allows us to execute and test the python code.
•
In order to make use of Jupyter Notebook, open Anaconda Navigator and click on Launch button under Jupyter
Notebook.
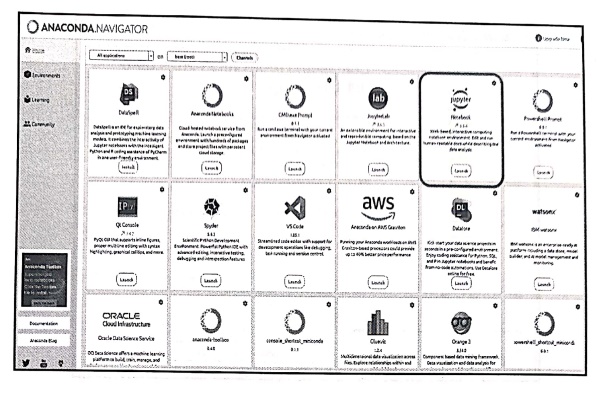
and
you will get the web page as follows ‒
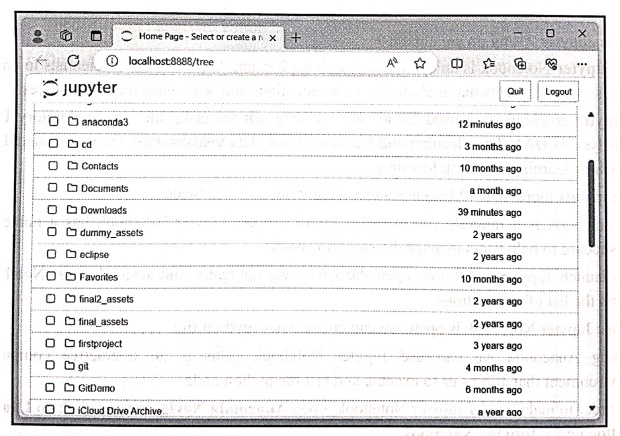
The
default website is localhost and the port number is 8888.
How to create a Notebook in Jupyter ?
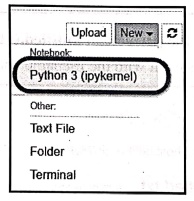
Click
on New button and select python 3.
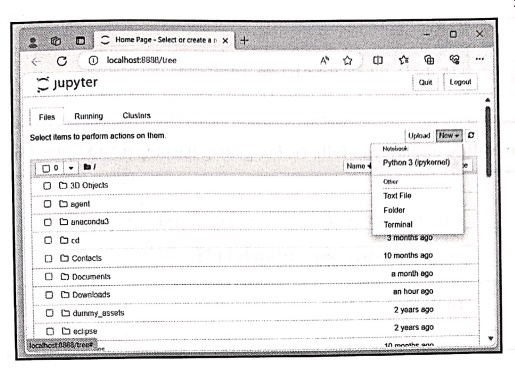
A
new window will be launched –
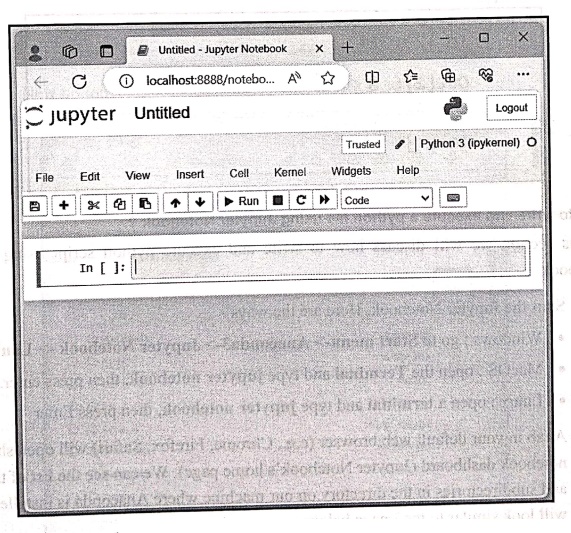
We
can type the code in In[ ] and then hit Shift+Enter
to get the output.
In[ ] : print(' welcome
friends!!!! ')

The
output will be displayed as follows. For getting the output hit Shift + Enter key.
In[1 ] : print(' welcome
friends!!!! ')
welcome
friends!!!!
In[ ] :\
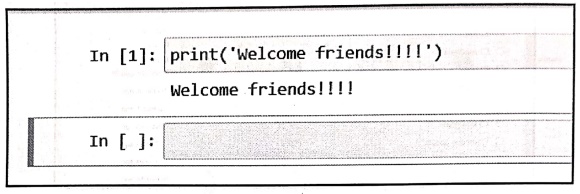
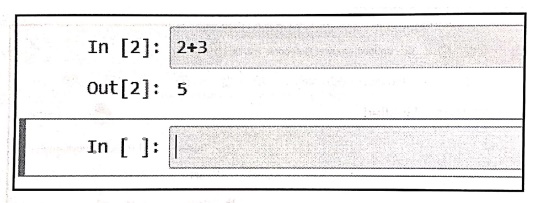
Another
example
In[ 2] : 2+3
In[ 2 ] : 5
In[ ] :
How to write and execute a python file using Jupyter Notebook?
In
this section we will discuss how to write and execute python script using
Jupyter Notebook.
Step 1:
Start the Jupyter Notebook. Here are the ways ‒
•
Windows: go to Start menu‒> Anaconda3‒>
Jupyter Notebook ‒> Launch.
•
MacOS open the Terminal and type jupyter notebook, then press enter.
•
Linux open a terminal and type jupyter notebook, then press Enter
Step 2:
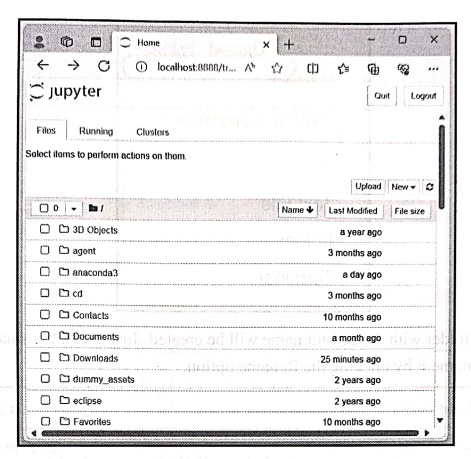
A tab in your default web browser (e.g., Chrome, Firefox, Safari) will open
showing notebook dashboard (Jupyter Notebook's home page). We can see the list
of the files and subdirectories in the directory on our machine where Anaconda
is installed. It will look similar to the image below.
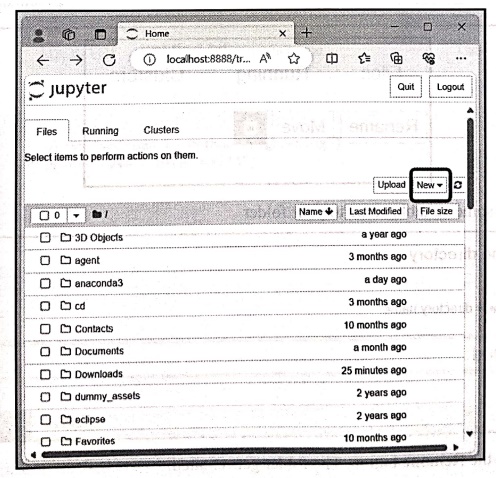
Click
on New option
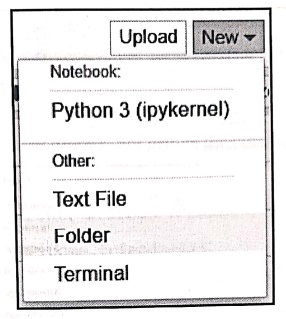
Select
the folder option so that a new folder will be created.
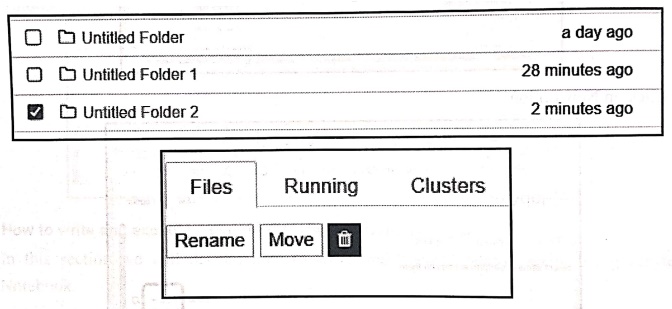
A
new folder with the default name will be created. Just check the small box left
to it and Rename it by clicking the Rename option.
Enter
some suitable name to your folder
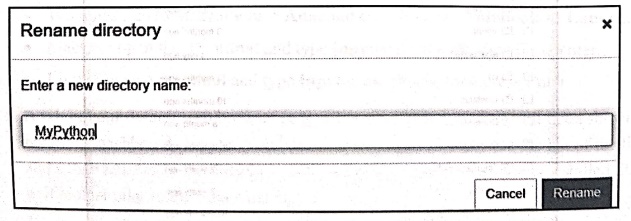
Click the Rename button. The folder gets created.
Step 2:
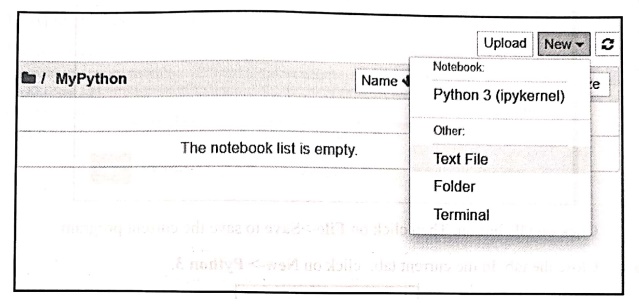
Now, open this newly created folder, click on New and select the Text
file option.
Step 3:
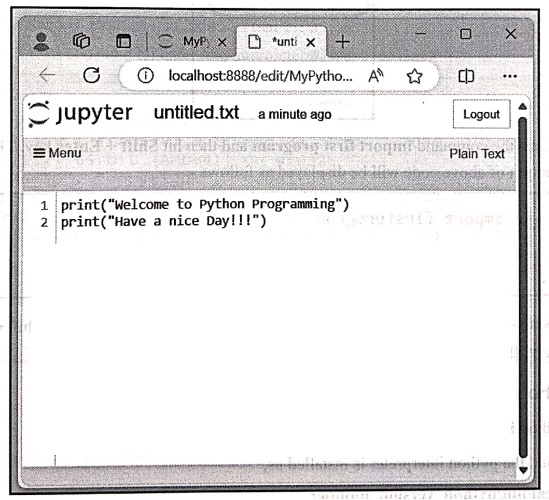
In a new tab Jupyter text file (By default untitled.txt)
opens up. Here we can write our python program and save it with the
filename and extension .py For
example ‒
Click
on untiled.txt(which appears at the
top of Jupyter Notebook) to rename the file. I have saved this file as firstprogram.py.
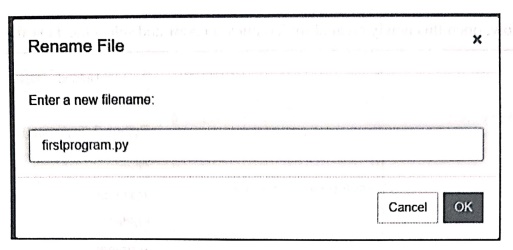
Click
on OK button. Then click on File‒>Save
to save the current program.
Step 4:
Close the tab. In the current tab, click on New‒> Python 3.
Issue
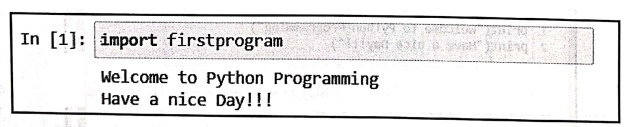
the command import first program and
then hit Shift + Enter key. The
output of above code will be displayed as follows ‒
In [1]: import firstprogram
Welcome to Python Programming
Have a nice Day!!!
Note
that to get the output after issuing any command we should press Shift+ Enter key. If we hit simply an enter key then simply a new line will be
added.
Python for Data Science: Chapter 1: Basics of Python : Tag: Computer Programming, Python, Data Science : - Installation of Python
Python for Data Science: Chapter 1: Basics of Python
Under Subject
Python for Data Science
AD25201 2nd Semester AIDS Dept | 2025 Regulation | 2nd Semester 2025 Regulation
Related Subjects

English Essentials II
EN25C02 2nd Semester | 2025 Regulation | 2nd Semester 2025 Regulation

Tamils and Technology தமிழர்களும் தொழில்நுட்பமும்
UC25H02 2nd Semester | 2025 Regulation | 2nd Semester 2025 Regulation
Linear Algebra
MA25C02 2nd Semester | 2025 Regulation
Applied Physics (CSIE) II
PH25C03 2nd Semester AIDS, CSE, IT, CSE(CY) Dept | 2025 Regulation | 2nd Semester 2025 Regulation
Digital Principles and Computer Organization
CS25C06 2nd Semester AIDS, CSE, IT, CSE(CY) Dept | 2025 Regulation | 2nd Semester 2025 Regulation

Basic Electrical and Electronics Engineering
EE25C01 2nd Semester | 2025 Regulation | 2nd Semester 2025 Regulation
Python for Data Science
AD25201 2nd Semester AIDS Dept | 2025 Regulation | 2nd Semester 2025 Regulation

Re-Engineering for Innovation
ME25C05 2nd Semester | 2025 Regulation | 2nd Semester 2025 Regulation
Python for Data Science - Laboratory
AD25201 2nd Semester AIDS Dept | 2025 Regulation | 2nd Semester 2025 Regulation